This Writer advanced tutorial explains how to change margins in Writer – LibreOffice, OpenOffice.
Margins are very easy to change in LibreOffice Writer – the document processor. When you are trying to fit a document in some layout/ trying to print in a different page type – you need to change the margins.
This is how you can do it.
Table of Contents
Change Margins in LibreOffice Writer
- Open an empty writer document and put some text into it. Or you can open your own Writer document.
- Open from the menu –
Format -> Page. On the Page style window, click on the Page tab. - On the Page tab, select the left – top – right – bottom margins in inches (Fig 1). Then press OK. You will see the custom margins are applied.
- If you are using the latest Notebookbar Tabbed layout, you can find the Margin option in the Page Layout tab (Fig 2), which gives you all presets and custom margin options.
- There is another alternate way as well. While the document is open, open the right sidebar using CTRL+F5. Click on the settings gear icon and click Page.
- Under the format section, select your desired pre-defined margins to apply to your document (Fig 3).


Zero Margins in LibreOffice Writer
- One of our readers commented on how we can set zero margins. Well, that is also possible.
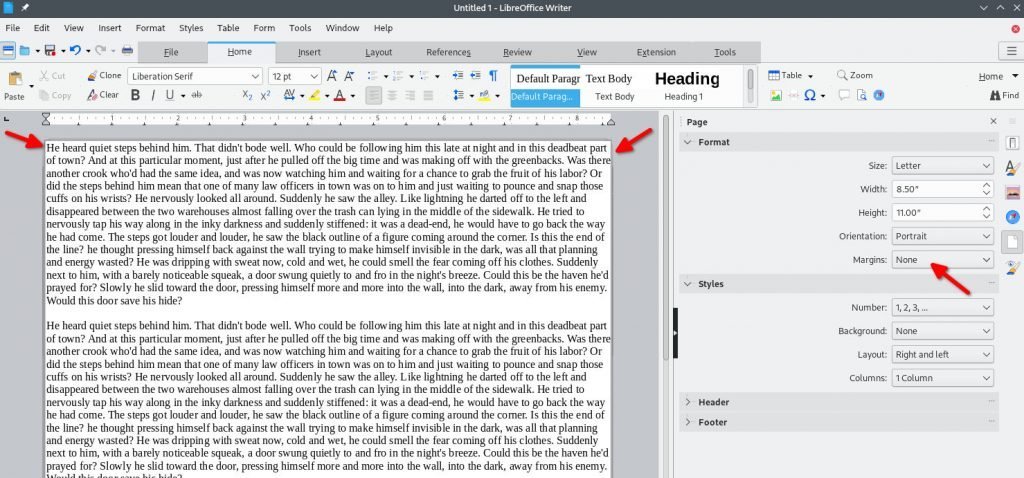
- On the right side, under format, choose Margins = None.
- Once you do that, you should see the texts resized to the extreme edges of the four sides.
- See the example image to get an idea (Fig 4)
Conclusion
This is how you can quickly change and add margins in a Writer document.
Does this tutorial help? Do let us know in the comment box.


Is there a way I can change the margins on every other page to be the same, for binding purposes, without having to change each page.
Yes, it is possible via custom style. Refer to this below guide where I am setting separate page sizes for different pages. Use this guide and instead of page size, change the margin and create a style. Then apply that style.
https://www.libreofficehelp.com/how-to-apply-different-orientation-in-specific-writer-page/
This is useless. It needs to be taken down. The program has user defined borders and the 0.00 still represents hefty borders.
You can easily set zero margins. See the updated article above.
could you make tutorial how to add each gap to images, it’s nutz if i do repetition again and again
Gap means? You mean border in images?
It is possible to set special margins in case footer and/or header is being used? I want to have top and bottom margin 2.50 cm, but in case footer/header is used, then 1.9 cm should be used. How can I set that?
If you are trying to have different margins for different pages for a single document, then you need to create custom style and apply that style to specific page.
Try something like this: https://www.libreofficehelp.com/how-to-apply-different-orientation-in-specific-writer-page/
You can customize above tutorial for margins. Try it out.
I am wanting to set margins per-page on a Draw document, which I cannot find any guide to doing. Is it possible?
Not helpful. I’m using a mac, no f5.
In sensible writing software the ability to choose how you want your pages to look is on the toolbar. It sure would be nice if this stuff made sense and was the same across platforms.