Here’s how you can autofit columns and rows in LibreOffice and OpenOffice Calc.
Taming unwieldy columns and rows in LibreOffice and OpenOffice is easier than you think. Imagine spreadsheets that adapt to your data, eliminating the need for endless manual adjustments. This tutorial explores the magic of autofit, your key to a well-organized spreadsheet.
To demonstrate this, we prepared the below sample data. As you can see, cells B1 and A2 have data that does not fit the cell. We will show you how to autofit them to the cell width or height without manually resizing them.
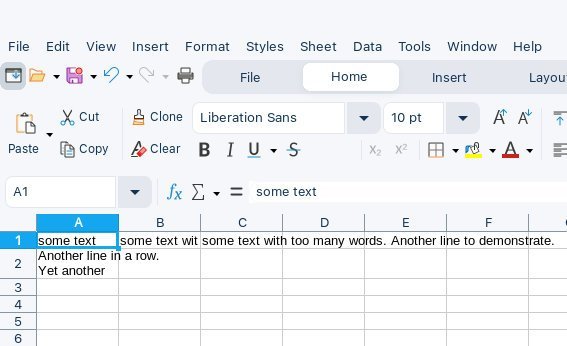
Table of Contents
Autofit rows and columns in LibreOffice and OpenOffice Calc
Single columns and rows
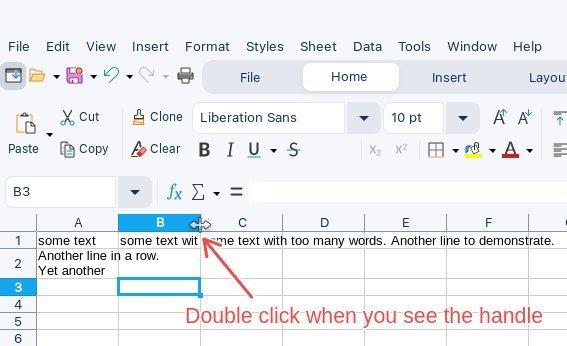
The most quickest way to autofit rows or columns is to Double-click on the row or column border! No menus, no fuss, just instant resize to accommodate your data’s needs. Got a row with multi-line text? Double-click its left border, and voila! It expands to reveal the hidden content. Similarly, a column overflowing with long entries? A double-click on its top border sets it right.
Here’s how it looks:

Bulk autofit of the entire sheet
Need to autofit multiple rows or columns at once? There’s the best way to do it.
Select the entire workbook by clicking the tiny square at the top-left corner, then navigate to Format > Columns > Optimal Width.
The same principle applies to rows: navigate to Format > Rows > Optimal Height, and watch those row heights adapt like chameleons.
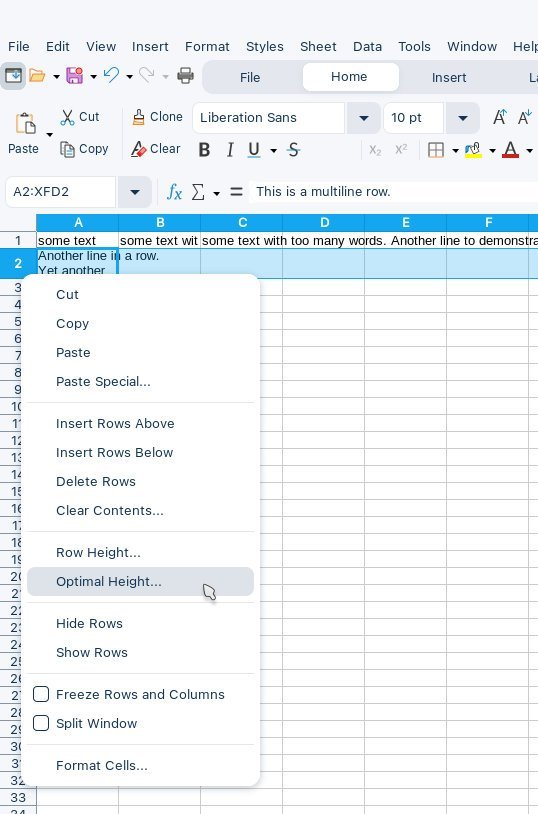
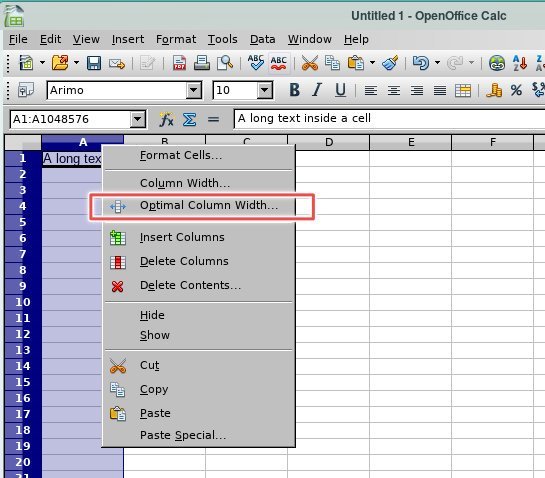
After selecting rows or columns, these two options are also available in the context menu.

After you select the option, LibreOffice will detect the measurement for optimal width or height automatically as shown below. Press OK without making changes.
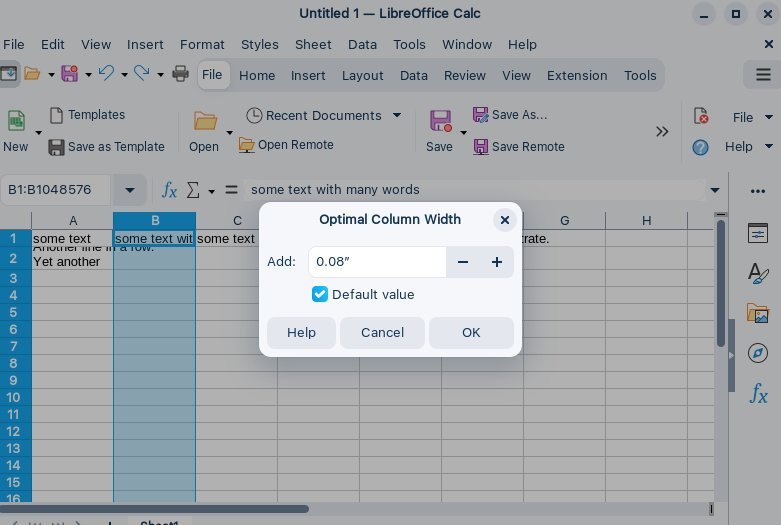
Remember This! Optimal height and width options only appear when you’ve selected a row or column, respectively.
Closing Notes
With the power of autofit, say goodbye to cramped rows and overflowing columns. Embrace streamlined spreadsheets that showcase your data with clarity and precision. Remember, a well-formatted spreadsheet is not just aesthetically pleasing; it’s also easier to navigate and analyze.
Cheers.


Your calc window looks really clean! Which distro, icon theme, and desktop environment are you using?
Thanks.
It’s Fedora 39 Workstation GNOME edition.
LibreOffice icon: Colibre SVG
GTK theme: Zorin Blue Light (https://github.com/ZorinOS/zorin-desktop-themes)
desktop cursor: ComixCursors White
Desktop interface font: SF Pro Text Regular
Thanks that is exactly what I was looking for, and you explained it quickly and clearly.
Have a great week 😀