


A tutorial explains how you can create relationships in LibreOffice Base between tables via design view.
In the prior tutorials, you learned how to create a simple database with tables and enter data using the graphical wizard in LibreOffice Base. That is pretty easy to do.
This guide goes another step towards difficulty. And we will create three tables with an example and establish relations between them.
The example following is a preparation for the upcoming guides, which goes further on creating forms and queries.
Table of Contents
Example table structure
For this demo, I will create three tables, as shown below. The player table contains the name and other details of the players.
The sports table contains the name of the sports and events.
And the last table is for establishing the player id with sports id – to show which player is going to play which sport.
- Table: player
- player_id (primary key), first_name, last_name, gender
- Table: sport
- sport_id (primary key), sport_name
- Table: rel_player_sport
- player_id, sport_id
Creating the tables
Follow this guide to create a database in LibreOffice Base. Give any name you want. I named it “example_sport_db.odb”.
In the LibreOffice Base window, click on “create table in design view” and create three tables as per the above specification.
Establish relationships
After you have created three tables, click Tools > Relationships from the main Base menu.
You should see the following window. The add table dialog should list the tables in your database. To establish a relationship, double-click on the tables to add them to the canvas. See below.

After adding the tables, click on the “new relation” button in the toolbar.

In the relations window, select the two tables where you want to establish a relation. And select the fields involved. Ideally, you should select the columns of the tables which are related key fields as per your database design.
In this step, you must carefully consider what relationship you want to establish. Yes, you can modify it later on as well.

Repeat the “new relation” process for each relation you want to establish. In this example, there are two relationships created, and it is shown below.

Once done, close the window to return to the main Base window. And start adding some data.
Double-click the table name in the main window to open the data entry grid. You can start typing your data here. You can press TAB to navigate between cells, and once done, click on Save.
View the relationship and modify them in LibreOffice Base
At any time, if you want to modify, you can select the relationship handle and right-click to edit. The handle becomes highlighted when selected. And then choose options from the context menu.

Handling errors and usage guide
Here are some errors and notes that you should remember while creating relationships.
- The column attribute involved in the relationship can not be changed once you define a relationship containing that column. If you do, you will get this error. Here, I am trying to change the column type during its part of a relationship.

- If it happens, delete all the relationship that contains that column. Change the column type. And finally, re-create the relationship.
- Similarly, you can not create a relationship between two columns when there is a mismatch in type. For example, here in the below example, I am trying to create a relation between two columns (sport_id) whose types are different in two tables (text and numeric).
SQL Status: S0021
Error code: -57   Column types do not match in statement [ALTER TABLE "rel_player_sport" ADD FOREIGN KEY ("sport_id") REFERENCES "sport" ("sport_id") ON UPDATE CASCADE ON DELETE CASCADE ] at /builddir/build/BUILD/libreoffice-7.4.3.2/connectivity/source/drivers/jdbc/Object.cxx:173

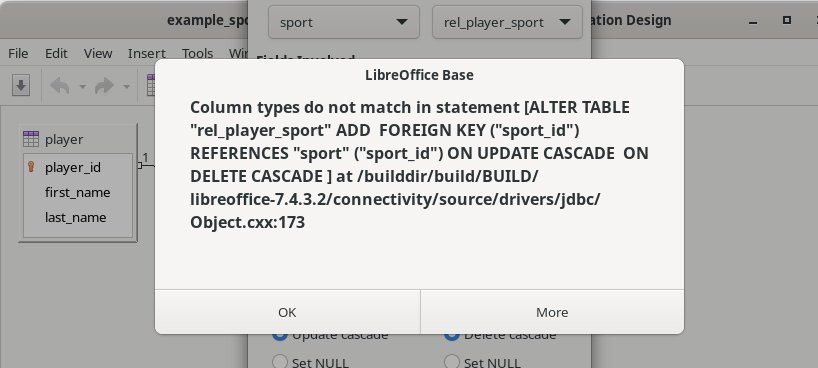
- If this occurs, you can change the column type and re-create the relationship again.
Summary
In this tutorial, you learned how to create relationships in LibreOffice base tables, change column types and handle some errors. If you have any questions, do let me know in the comment box below.