


This beginner’s tutorial will demonstrate how to insert and use images in LibreOffice Writer.
Images are important when you are preparing any documents, and they give the necessary importance to the purpose of the document.
Inserting images and using them is very simple in LibreOffice Writer. Here’s how you can do it
Table of Contents
Insert and Use images in the Writer
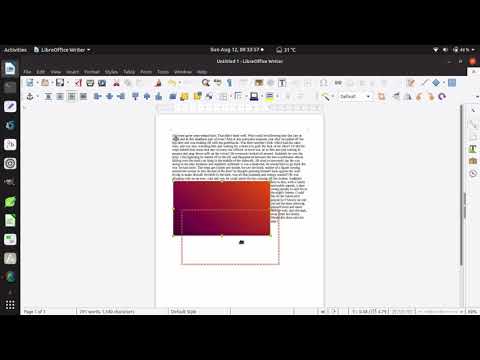
- Put the cursor at the position where you would like to insert the image on the Writer page.
- From the menu, choose Insert – Image. A dialog would open to choose the image. Select the image and press open.

The image would be inserted in the cursor position of the writer’s document.

Types of images supported by Writer
Below is the list of image file types supported by LibreOffice Writer:
- BMP – Windows Bitmap
- DXF – AutoCAD Interchange Format
- EMF – Enhanced Metafile
- EPS – Encapsulated Postscript
- GIF – Graphics Interchange Format
- JPEG – Joint Photographic Experts Group
- MET – OS/2 Metafile
- MOV – QuickTime File Format
- PBM – Portable Bitmap
- PCT – Mac Pict
- PCX – Zsoft Paintbrush
- PDF – Portable Document Format
- PGM – Portable Graymap
- PNG – Portable Network Graphic
- PPM – Portable Pixelmap
- PSD – Adobe Photoshop
- RAS – Sun Raster Image
- SVG – Scalable Vector Graphics
- SVM – StarView Metafile
- TGA – Truevision Targa
- TIFF – Tagged Image File Format
- WMF – Windows Metafile
- XBM – X Bitmap
- XPM – X Pixmap
Video Tutorial
You can also watch the video tutorial on how to insert images in LibreOffice Writer.
Direct YouTube Link: https://youtu.be/PPVvvkZizog
Troubleshooting
If you are not able to see images and if it’s related to the JRE issue, try to turn on the option: Tools>Options>LIbreOffice Writer>View>Display>Images and Objects

Summary
This is how you can insert images in the Writer document.
If you like this tutorial or you have any suggestions or questions about it, drop a comment using the box below.