


This Writer advanced tutorial explains how to change margins in Writer – LibreOffice, OpenOffice.
Margins are very easy to change in LibreOffice Writer – the document processor. When you are trying to fit a document in some layout/ trying to print in a different page type – you need to change the margins.
This is how you can do it.
Table of Contents
Change Margins in LibreOffice Writer
- Open an empty writer document and put some text into it. Or you can open your own Writer document.
- Open from the menu –
Format -> Page. On the Page style window, click on the Page tab. - On the Page tab, select the left – top – right – bottom margins in inches (Fig 1). Then press OK. You will see the custom margins are applied.
- If you are using the latest Notebookbar Tabbed layout, you can find the Margin option in the Page Layout tab (Fig 2), which gives you all presets and custom margin options.
- There is another alternate way as well. While the document is open, open the right sidebar using CTRL+F5. Click on the settings gear icon and click Page.
- Under the format section, select your desired pre-defined margins to apply to your document (Fig 3).


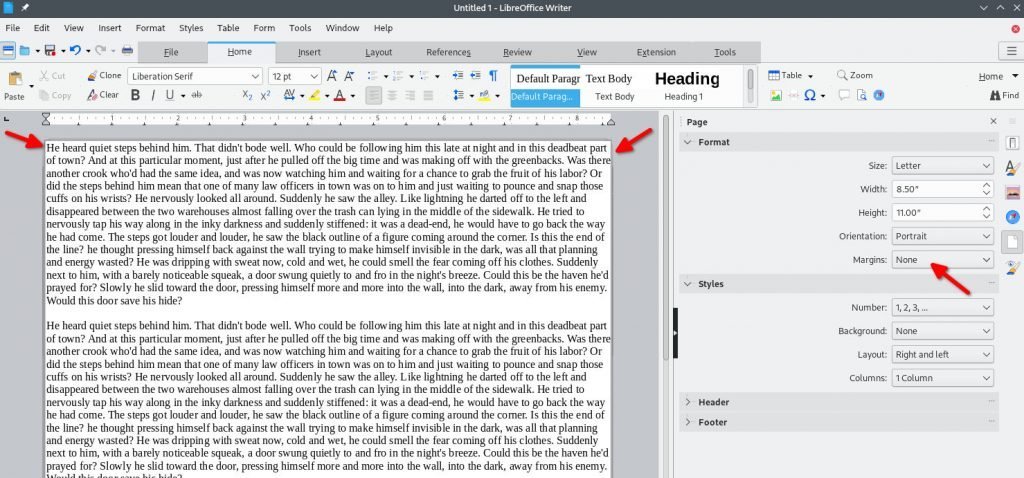
Zero Margins in LibreOffice Writer
- One of our readers commented on how we can set zero margins. Well, that is also possible.
- On the right side, under format, choose Margins = None.
- Once you do that, you should see the texts resized to the extreme edges of the four sides.
- See the example image to get an idea (Fig 4)

Conclusion
This is how you can quickly change and add margins in a Writer document.
Does this tutorial help? Do let us know in the comment box.